Bridging Task.
For this task I had to go around the city at night taking photos of different things such as street lights to show the city when its emptier and only lit by lights and the moon. For these photos I went to the south bank and walked around areas nearby to find 'hidden' spots that would fit this brief.


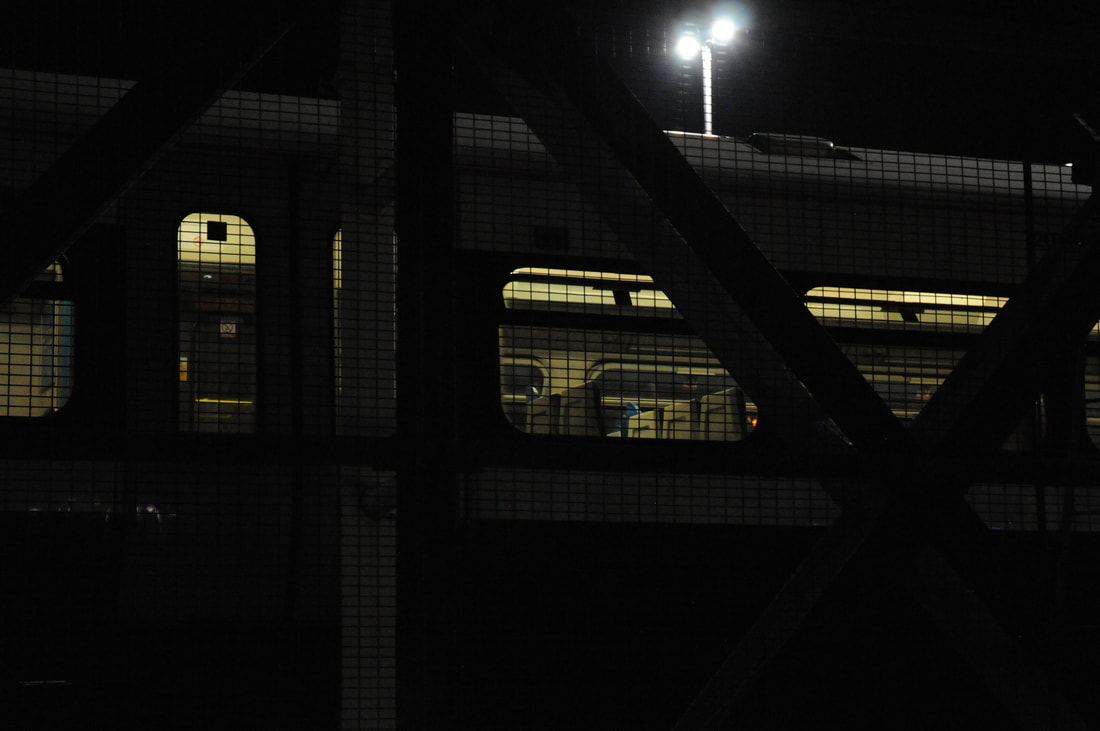


WWW. In this set I think I took some interesting photos of the city at night whilst using good composition and ISO.
EBI. I corrected the focus in some photos as they are blurry and would be more effective is the were clearer.
EBI. I corrected the focus in some photos as they are blurry and would be more effective is the were clearer.
Dark Room
in te dark room teere is enlargers ad trays wit cemicals in tem. tese cemicals are used for developinng potos and are called developer, stop and fix. it is lit wit a red light so notig gets eposed.

Photograms
For this task we were experimenting with making photograms in the dark room. For this I took photographic paper and places different objects over it and using the enlarger exposed the non-covered paper. I tried lots of different techniques to create different effects such as: double exposure, normal, painting and more.
'A photogram is a photographic image made without a camera by placing objects directly onto the surface of a photo-sensitive material such as photographic paper and then exposing it to light. The result is a negative shadow image varying in tone, depending on the transparency of the objects used. Areas of the paper that have received no light appear white; those exposed through transparent or semi-transparent objects appear grey
Normal Photogram
To create this photogram i placed objects over a piece of photographic paper ad exposed it using the enlarger.

|

|

|

|

|

|
Painted Photogram
to create this i made an ordiary photogram but before exposing it i used a paitbursh to splash developer onto the phhoto and once i was happy wih thhe splashes i developed the phhoto as a whole resultig in darker splashes over the photo.

|

|
Double Exposure Photogram
this was made by starting makig a ormal phhotogram but before developig it exposig agai with different obects this time, this meas that whhe i developed it it was a double exposure photogram.

|

|

|

|

|
Sandwich Print

|

|
Solarisation

Weaving
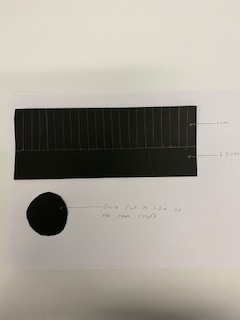
to get this final product i made 2 photograms cut them up o strips of 0.5cm strips ad wove them together to create a woven photograph.

Pin Hole camera
Ben Nathan
For this pin hole camera task we looked at Ben Nathan for inspiration. we used the same techniques as ben using a can and photographic paper to take these photos. for his photos Ben took photos using a pin hole camera he made out of a beer can and photographic paper, he went round St-Cyr square in Beziers St Jacques neighbourhood and took photos of people using the can.
For this pin hole camera task we looked at Ben Nathan for inspiration. we used the same techniques as ben using a can and photographic paper to take these photos. for his photos Ben took photos using a pin hole camera he made out of a beer can and photographic paper, he went round St-Cyr square in Beziers St Jacques neighbourhood and took photos of people using the can.
Examples of his work

|

|

|
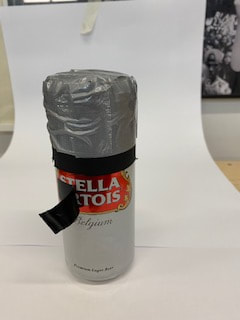
A pin hole camera is a camera without a lens and a pinhole for a tiny aperture, which allows just enough light for a image to come trough and be projected opposite the hole, this is known as the camera obscura effect. In class we recreated this using a can, black tape and card. To do this I took the top of the can and filed it down so it wasn't as sharp. After this I had to measure out 1cm stripes and cut them leaving 3cm at the bottom, this then folds round the top of the can and gets taped down, this acts out a lid for the can that doesn't let any light in so the photographic paper doesn't expose before you ant it to.
A pin hole camera is a camera without a lens and a pinhole for a tiny aperture, which allows just enough light for a image to come trough and be projected opposite the hole, this is known as the camera obscura effect.
First I made a circle the same size as the top of the can and measured a rectangle and cut along the lines
|
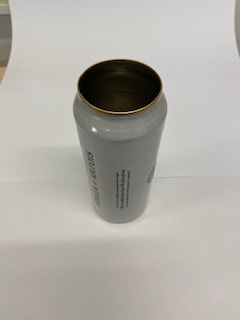
Then I got my can and took the top of
|
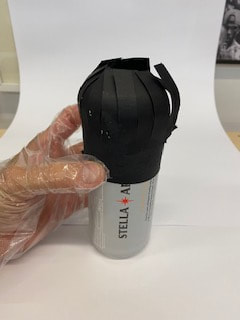
i folded the card around the can and taped the side to keep the card in place
|
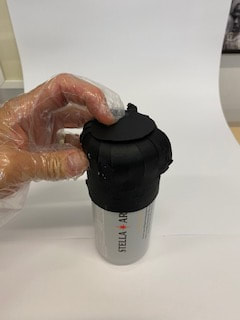
then put the cicle on top and tape it with gaffa tape
|
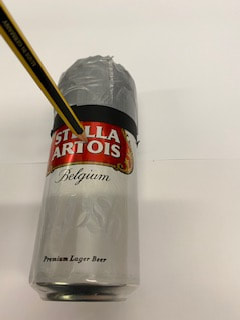
poke a hole
|
using black tape cover the hole so it doesnt expose the paper
|
My Photos

|

|

|

|

|

|

|

|
Film Camera

|
For this task we were learning how to use an SLR camera. With an SLR camera the light has to pass through a lens, which sharpens the image and controls the intensity of light through a control known as the 'aperture'. The light is allowed to hit the film for a period of time, which is controlled by a shutter mechanism. We learnt how to load the film camera then tried taking photos testing different shutter speeds and apertures to get used to the camera.
|
Aperture work
Aperture in photography is how much light is let though into the camera, this is measured in F stops. If you want a photo with a shallow depth of field you would need a large aperture for example f/1.4 this means the foreground will be in focus and the background will be blurry. However is you want a photo with a large depth of field you would need a small aperture around f/22, using this depth of field would mean that everything is in focus.
To practice using a range of apertures with a film camera I got a subject to pose for some photos changing the aperture between shots to see the difference in apertures.
To practice using a range of apertures with a film camera I got a subject to pose for some photos changing the aperture between shots to see the difference in apertures.
My photos

|

|
Shutter Speed work
Shutter speed is the speed of the shutter in the camera closing, a fast shutter speed creates a shorter exposure and a slower speed creates a longer exposure. This can effects how light or dark the photo comes out, as well as if the subject is burred or still.
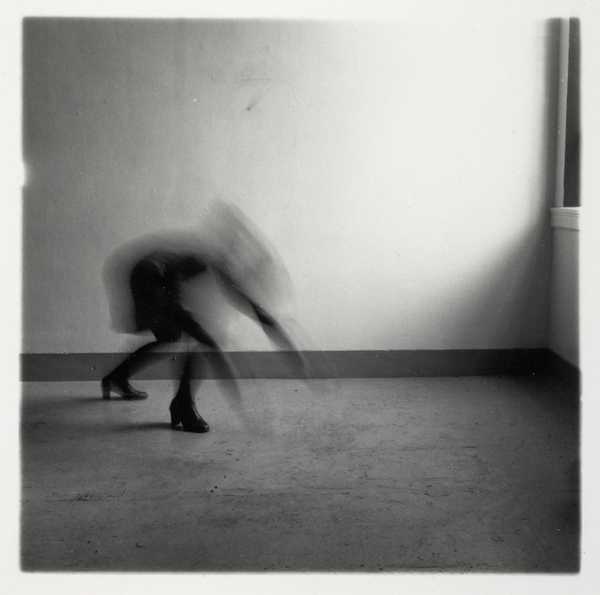
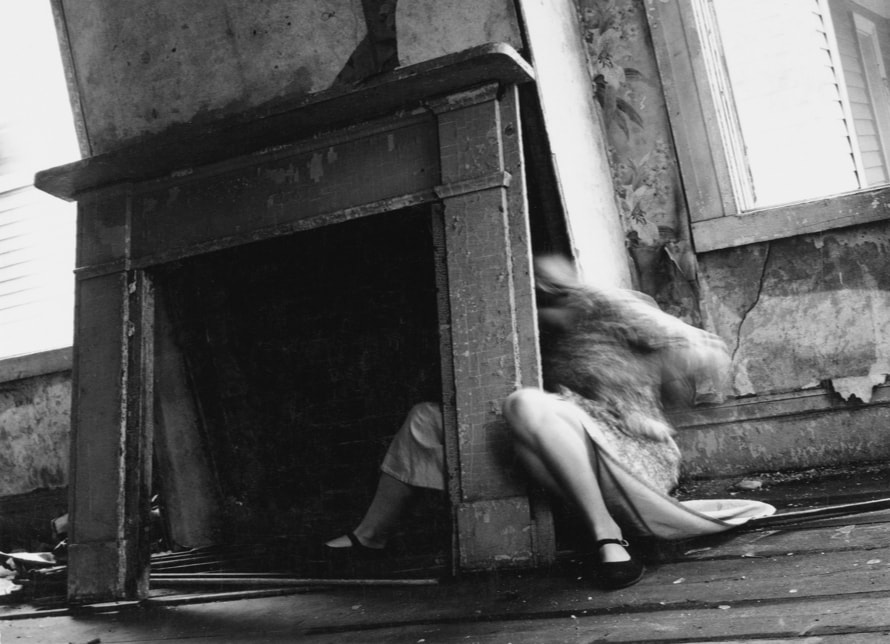
For these photos we looked at work by Francesca Woodman as she focuses on shutter speed in her work using it to blur parts of the figures in her images.
Francesca was born in America on the 3rd of April 1958 and died in 1981 by committing suicide. Her parents were artists and she went to the Rhode island school of design between 1975 and 1977. She addressed quite a few issues in her images such as gender and self, representation of the body and disturbing psychological values. She also had intentions such as movement and urgency, to show what's not seen and evoke uncanny feelings. She had many influences like spiritualism and symbolism as well as Max Klinger and Deborah Turberville.
Examples of her work

|
|
|
My photos

|

|

|

|
Processing and Printing
To start the developing process I learned how to unload the film from the camera and develop the roll so it wouldn't keep exposing in the light. Then once this was dried I put together a contact sheet. This took a while as some photos had different exposures meaning certain photos had to be exposed for longer then others. To know this I started by making a test strip which then helped me when making the whole contact sheet.
Once I had finished putting together the contact sheet I moved onto printing individual frames. To do this I used the enlarger and chose the photo I waned to print. Using a piece of card I made a test strip to see the right exposure I needed to print the photo. Once I had done this I printed the full photo making sure it was in focus using the ... after adustig the focus i exposed the paper with the projection annd then went onn to deevelop the photo.
Contact Sheet

|

|
Test Strips
to make these test strips i had to cover parts of the paper whilst exposing the uncovered for 1 second and worked across the photo.
to make these test strips i had to cover parts of the paper whilst exposing the uncovered for 1 second and worked across the photo.

|

|

|
